Super Nintendo - USB Controller
Wouldn’t it be great to be able to play video games on your PC with a Super Nintendo Controller!? Well, now you can! SNES USB Controllers can be quite expensive if you buy them already pre-made, but if you purchase a kit and an old used SNES controller, you can save a bundle.
RetroUSB
RetroUSB is a place where you can purchase pre-made SNES USB Controllers, as well as simply purchase the kit’s needed to build your own. Don’t let “build your own” intimidate you, making your own is a lot easier than you think. You’ll only need three items.
- RetroUSB – NES/SNES RetroKit
- Soldering Iron / Soldering Gun
- Old SNES Controller
Note: One key thing that you need to know is that only old original SNES controllers will work with this method. You cannot purchase one of the newer models or one of the off brand models.
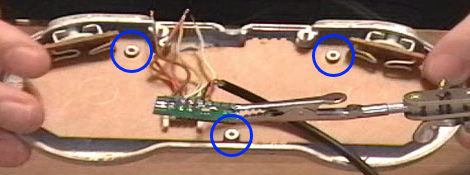
First, you’ll need to take out all the screws and open up the old SNES controller. It’s very easy to do, all the screws are easy to find. After you’ve done that, you’ll have your controller opened like this:
As you can see in the above image, I have already clipped the SNES wires and stripped them down a bit. You don’t need to strip them down very far, but if you accidentally do, that’s fine too. So now you should have an open controller with stripped down wires. This is where the chip you just bought comes into play. I used a little stand and clip to hold my chip in place so you guys can watch, but you can probably just do it on any flat surface. Now onto the video of how to solder it together!
PS: My soldering skills are just plain horrible! Thus proving that ANYONE, with the right tools, can do this easily.

